Browsing Category

Teacher Tools

Teacher Must Have: Automatic 3 Hole Puncher

An absolute teacher must have is an automatic 3 hole puncher. Yes, automatic! As in, it punches the holes for you! You don’t have to push down! πŸ™‚ πŸ™‚ Literally just hold the papers in it and it punches 3 holes in them. It can do up to 20 pages at a time so I can do huge stacks of papers really quickly without tiring out my hand or worrying about hurting the hole punch.


I cannot believe I wentΒ years without knowing this existed when I discovered it a few years ago. I am constantly needing to 3 hole punch papers for binders so it’s super convenient. Especially at the beginning of the year, this saves me so much time. I’m providing links directly to it so you can find the exact one that I have quickly – they’re technically affiliate links which means I earn commission on sales made through the link – but that doesn’t affect my recommendation… I love this awesome teacher tool!


I actually loved this automatic 3 hole punchΒ so much that I bought a 2nd one so I could have one in 2 different places. πŸ™‚ It is amazing how a simple invention you didn’t even know you needed can make constantly handling and organizing lots of papers so much easier.


Having an automatic 3 hole puncher is also great for things like making student books!


You can 3 hole punch their papers for the book project SO quickly. Quickly punch a stack of the papers for the books for each student. Then, have them work on the pages individually. When they’re all done, they put the pages in order to make their book. Then, have them take a little string of colorful yarn to make little ties in each of the 3 holes. This creates such cute books!


Anyway, I love my automatic 3 hole punch and wanted to tell you about it! I used to fight with my manual one all the time. I eventually got a nicer one that could handle more pages but it still got tiring to clamp it down all the time and I just always felt like I wasn’t aligning the 3 holes exactly or they’d rip when I pulled it out… it was a random source of frustration I didn’t realize there was a solution for, so maybe it can be one for you too! πŸ™‚


If you want to see more recommendations of mine, check out my AWESOME LISTS page! You can also find several ways to follow along with Teachers Love Lists on the right side of this page if you scroll through it. Thanks so much for reading!

Best Glue Sticks for Crafts

I love doing paper crafts! The best glue sticks for crafts that I have found are the super simple purple ones for kids that are often in the back to school supplies section. They’re great for students in the classroom, kids at home… and well, adults at home too πŸ™‚


They are the best, in my opinion, because you can see exactly where you put the glue and how much you put. When you roll it on, it’s purple but then it dries clear so you can see where the glue is while you’re working but not see it in your final product. Perfect for making sure you or kids don’t use too much glue. I hate when papers feel soggy from too much glue & I feel like that happens so much less with these.


They are GREAT for kids doing notebook activities, cutting and pasting worksheets, writing crafts, any paper crafts in general… but I totally use them as an adult too! πŸ™‚ I found direct links to them for your convenience – these are affiliate links which means I earn commission on sales made through the links – it doesn’t cost you anything extra but I thought I’d let you know. It also doesn’t change my opinion.. I love these! πŸ™‚


This pack of glue sticks is the type that I personally buy. I usually buy them in smaller packs like these throughout the year as I need them in the 2nd half of the year. Sometimes I buy the 2 packs if I need them quickly and want only a couple.


If you are buying them for a classroom, I totally recommend this box of 30 glue sticks!! It is an awesome way to get a bunch of them. I highly recommend using black permanent markers to write students’ names or student numbers on each one so it’s theirs. They will probably take A LOT better care of making sure the glue stick’s cap is on tight if they know that one is theirs. In my opinion, they’ll take a lot better care of it if they know they only get 1 to use and take care of. πŸ™‚


If you want to use regular glue bottles, I recommend these. Glue bottles and sticks are one of those teaching supplies I am very specific in what brands I use because there is a noticeable difference in quality, in my opinion. I’ve always loved these glue bottles.


If you are going to use glue bottles with kids, this book about using too much glue is super fun to read! It is from my huge list of behavior books organized by behavior that is awesome for both teachers parents to read books that teach specific character skills πŸ™‚ I think it’s fun to read even if you use glue sticks instead of bottles.. it’s a silly book that I find fun in general!


I hope this was helpful for you in finding the best glue sticks for crafts projects! Check out my AWESOME LISTS page to see more of my recommendations, book lists, and more fun & helpful lists for teachers and parents! You can also look for ways to follow my blog on the right side of this page if you liked this and want more. Have fun crafting!! πŸ™‚


Bulletin Board Borders Storage Ideas

Bulletin board borders storage ideas are something I searched for a few times when I was trying to figure out how to organize all my borders and I kept coming up with the same results. Then, I just happened to see this AMAZING pocket chart while walking around a teacher supply store a few years ago and immediately fell in love.


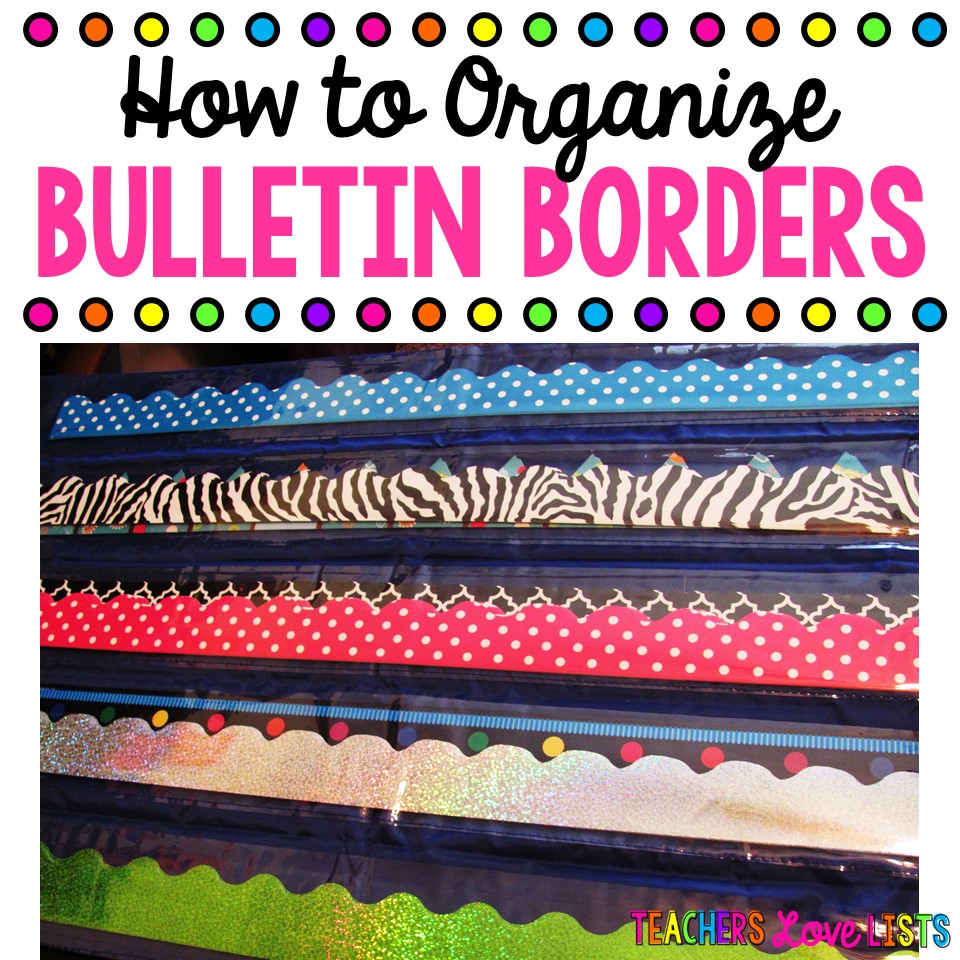
Bulletin board borders storage ideas that make organizing all your borders so easy and quick!


I was hesitant to believe it actually worked or would save space.Β When I think of pocket charts, I think of them taking up a decent chunk of space. However, this amazing one FOLDS up so it’s only one pocket thick so you can make it SO small and thin and tuck it anywhere!


This post has affiliate links to the pocket chart I use which means I get commission if you purchase through the link – I don’t care if you do or don’t – but I wanted to be transparent and let you know πŸ™‚


The one I’ve been using and loving is this Border Storage Pocket Chart!


All you do is put your bulletin board borders in each of the pockets (I put several different border sets in each pocket as you can see here) and then roll it up and it’s TINY! It folds up to the size of only 1 pocket!


The best part about it is your borders are kept perfectly STRAIGHT. Before I had this amazing border organization masterpiece, I was rolling my borders in a roll then clipping them with a binder clip. That wasΒ not very space saving or quick to do, but what I disliked most about it was my borders were all curled when I unrolled them which made putting them up on the wall frustrating. Maybe that’s just me, but it bothered me so I absolutely love that this stores them flat. Plus those rolls took up space and didn’t look very pretty – I had to just shove them in a cabinet.


Also I often have extra small pieces of border I cut off the ends sometimes when I’m trying to fit borders on a board so this lets you simply put those in the pocket with the rest instead of trying to clip them on the inside of the roll. I don’t feel like rolling them up really kept them protected either. Plus the clip sometimes left indentations I didn’t like right in the middle of the borders. So I absolutely love how this keeps them protected in the pockets.. and also not dusty πŸ™‚


Anyway, I absolutely love this thing so I was excited to show it to you. I put all of my borders in it then fold it up into one little strip and shove it between my filing cabinet and desk. Yes, it actually fits in that tiny slot! πŸ™‚

This shows it unfolded but you can find pictures of it folded up too to show you what it looks like.


Any time I want to get out a new border, I simply grab it and unstrap it. It folds out into the pretty display of all my borders, like I showed in the 1st picture in this post, so I can pick the border I want to use. It makes doing a new bulletin board so much more fun to be able to see them all displayed and pick the one I want. Before, when I was rolling them, I would have to think of the one I wanted first then rummage through to find the roll by looking at each one and pulling out each roll I had thrown into the back of a cabinet.


This way, it’s more creative and fun and sometimes I get bulletin board ideas simply looking at my pretty display of them πŸ™‚ I can also pick out 1 piece of each bulletin border really easily to put it next to what I want to display and see if it goes together nicely. So easy to take out and put back.


I hope you love it if you get it!


If you have any fun ideas for how you store your bulletin board pieces, let me know below!


For actual pieces like letters, I put them in sheet protectors in binders so I can quickly find the letter sets I want. There’s an extra tip for you πŸ™‚ For a tutorial on how to make your own bulletin board letters, check out DIY Classroom Decor Bulletin Board Letters


This was shown in my Classroom Must Haves list – you can check out that list if you want to see other things I love and recommend.


I really enjoy making lists so if you are in the mood to browse fun teacher lists (or want to save the page for later), here is a big list of the lists from this page πŸ™‚

AWESOME LISTS


Here are a couple lists I’ve made to get you started:

Classroom Management Books Organized BY BEHAVIOR

Giant List of Classroom Jobs


Thank you so much for stopping by!


If you want to save this post to read again later, you can hover over this picture below and use the red “Save” button to pin it! πŸ™‚

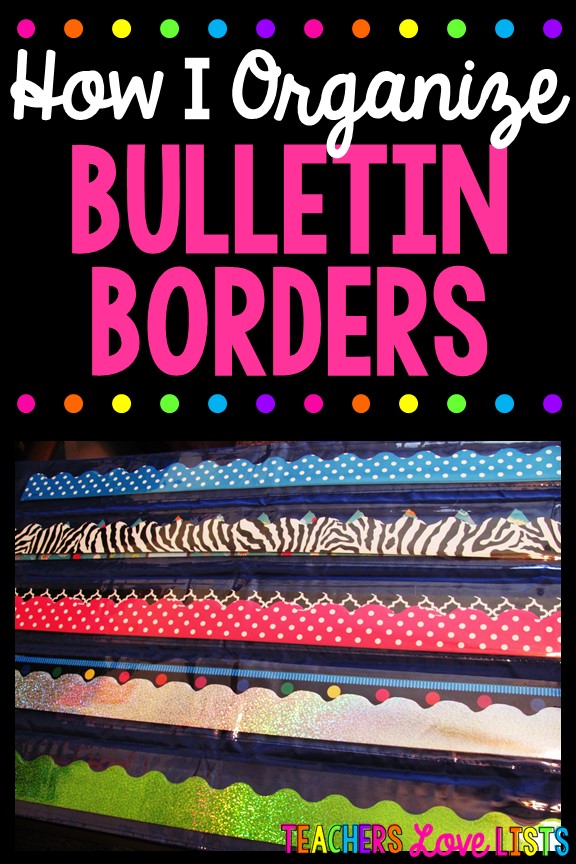
Bulletin board border storage solution! This amazing pocket chart holds all of your borders so you don't have to roll them up and clip them or shove them in a cabinet. It folds up and holds so many borders!

Fastener Tape – Teacher Supplies List Must Haves

Fastener tape is one of the first items I want to show you for my Teacher Supplies List Must Haves series!


I absolutely LOVE fastener tape! It makes it so easy to create reusable centers and activities that you make once and then can use year after year and is something that I think every teacher should have in their toolbox!


Here is exactly where you can get it on Amazon!Β I’m an affiliate which means I get commission for purchases made through the link. I only recommend things I absolutely love but I wanted to be super transparent (like regular tape, lol) and let you know! πŸ™‚


You can click here or on the picture to check it out on Amazon πŸ™‚


It comes in a roll of tape and is super easy to use. If you want to see one example of a way to use it, check out this post on Fact Fluency in First Grade. Scroll until you see the red paper that says “Fact Fluency.”


That section shows how you can take any cut and paste worksheet and turn it into a fun, interactive center. Once you make them, they’re so easy to pull out for centers year after year. I LOVE making math cut and pastes into centers especially, but you can do it for any cutting and pasting activity that you have. Seasonal ones are super fun to make, as well as phonics, grammar, or any subject. It’s such an easy way to make what starts out as a worksheet A LOT more fun!


Important tips when Buying:

– COLOR: Check to make sure you buy the color you want! I prefer the clear so you can see through it.Β If you look at the red Fact Fluency center mat again, you can see how you can see through it in order to see the answer key.Β This makes clean up soo much easier because kids can see exactly where to put the piece back which is awesome! I also often see the tape in black so look at the picture to make sure it’s the color you want.

– WIDTH: Check the width of it. They can come in very different widths. For making activities, I like 3/4 inch (0.75). I think anything between half an inch and an inch is great for making activities.

* Think about how you want to use them and what size/color would work best for you. I put links to the ones I like but you might like a different one! There are several different brands that make really high quality fastener tape and dots πŸ™‚


Speaking of dots! If you don’t want to cut pieces to the exact size you want, or think you’ll always want about the same size, they come in fastener DOTS too.Β The dots are so cool! I love using them as well… especially for square cut and paste activities that have decent size pieces:


Important Tips when Creating Activities:

– Laminate the page OR use heavy duty sheet protectors. You can make these super easily with sheet protectors but definitely make sure the ones you’re using are labeled “heavy duty” so it doesn’t tear when kids take the pieces on and off.

– Each piece has 2 sides: what I call the “scratchy” side and the “fuzzy” side. I always put the fuzzy side on the mat and the scratchy side on the back of the piece. That way, itΒ doesn’t scratch your other papers if you stack them, store them in a file, etc. Plus, the “scratchy” side is clearer so it’s easier to see through for putting pieces back.


For more creation tips, the Fact Fluency post that I keep mentioning has much more thorough instructions with pictures. That post may have been what brought you here, though! If that’s the case, peek around here if you want! πŸ™‚ I share a ton of lists of teacher tools, supplies, book lists, and other random lists like classroom jobs, themes, teaching interview questions, all sorts of things. I love sharing ideas and especially making lists! πŸ™‚


Feel free to ask me any questions you have below – I am happy to help!


For more fun lists, check out the page that has all of my lists on this blog organized by category:

AWESOME LISTS


A few favorite ones to get you started are:

Classroom Management Books Organized BY BEHAVIOR

Giant List of Classroom Jobs


Thank you so much for stopping by! Feel free to follow me on Facebook if you want to follow along. You can also go directly to teacherslovelists.com to see if I have any new posts. I have a lot of posts planned out to post this month and next month. I appreciate you reading all the way to this point if you did! πŸ™‚